There’s a lot to dig into in this guide to wheel pose. Click one of the links below to skip ahead to any section of this post!
Table of Contents

Wheel pose is a goal for many new yoga practitioners because it serves as a significant milestone on the road to practicing deeper backbends. Wheel pose is by no means an easy or accessible pose when you’re relatively new to yoga! It is a great backbend foundation to work toward because your full body is working when doing wheel pose.
Wheel requires flexibility in the entire front body and strength in the entire back body. Once you can do wheel, you’re well on the way to be able to practice many other types of backbends with strength, integrity, and ease.
Pain and discomfort in backbends
When I started practicing wheel I would experience lower back pain. This is a very common issue for many yoga practitioners if they’re lacking strength or flexibility in certain body areas. I was lacking hip flexibility and my lower back was compensating for it.
When our whole front body and spine isn’t flexible enough that we can bend evenly throughout the entire body, the majority of the backbending ends up coming from just one area, which causes strain, pinching sensations, and pain in that area. For many, that area is the lower back because it has a natural curve.
Forcing the natural curve of our lower back to do our entire backbend for us is not sustainable for our bodies in the long run. I highly recommend that you work on opening up some of the tighter areas in your body so you can backbend evenly and feel at ease when doing so. That’s what this post is all about achieving!
It’s what I had to do in my yoga practice and it ended up helping me feel immensely more comfortable in my yoga practice. I now feel like I can backbend with ease, strength, and integrity and I rarely deal with lower back pain in my yoga practice anymore.
When I do experience some pain, it’s a reminder not to go too deep into backbends without strength and integrity and to be patient with the yoga practice. Progress will come with consistent practice.
Let’s dive into how you can feel great in wheel pose!
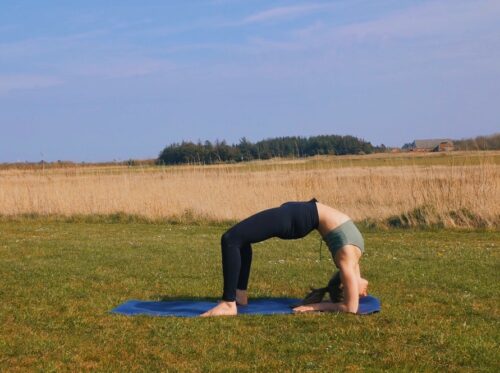
Wheel Pose
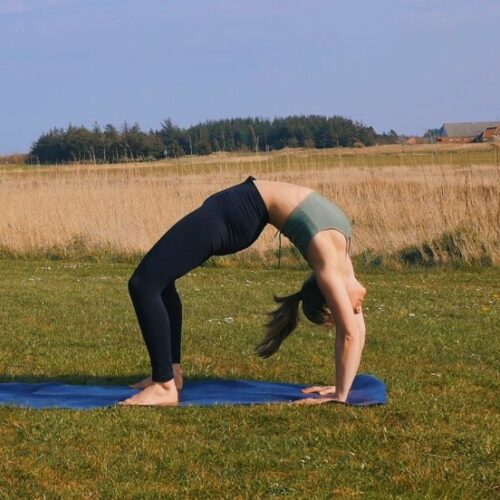
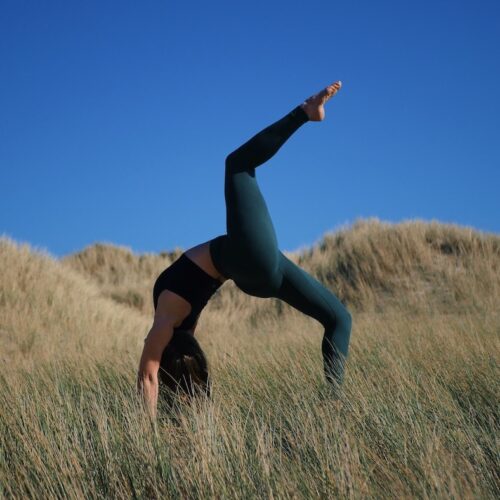
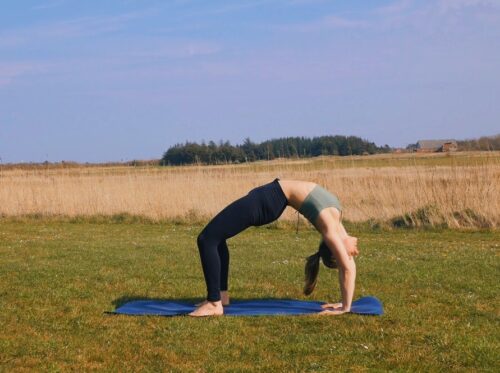
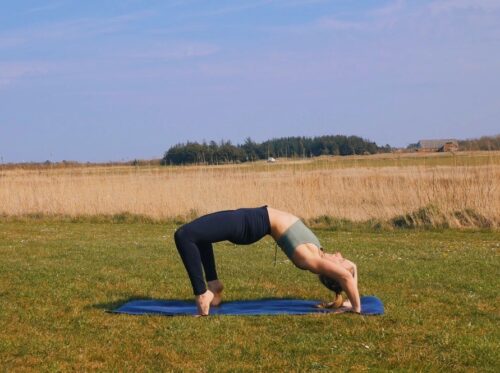
For wheel to feel good in most bodies, it generally needs to look more like an upside down U (even bend) than an upside down V (bending from one area). Wheel pose can still feel intense since the entire front of the body is being stretched and the entire back is actively engaged to keep you in the pose. But it should never feel painful. Listen to your body when you practice wheel and modify if you need to to feel comfortable in the pose. Whichever variation you’re doing, remember to breathe deeply. Being mindful of the breath always helps.
Tired of dealing with aching wrists in your practice?
Get The Complete Wrist Guide so you can practice yoga, arm balances, and handstands with ease and stability!
The ebook includes 17 exercises that build strength and flexibility in your wrists and forearms, two exercise program templates, and a printable wrist exercise sheet, along with tips on how to position your hands and distribute weight in your palms for optimal comfort and balance.
Alignment
The feet are parallel and hip width apart. Think about squeezing the inner thighs so the knees stay parallel too. Push into the whole palm of your hands evenly and collect the shoulder blades on your back to open the chest.
Tuck the pelvis slightly so your pubic bone moves forward to elongate the lower back. Engage your glutes and abdominal muscles to support the lower back area. Straighten your elbows (if possible) and squeeze your hands together to activate the muscles along the inside of your arms.
Common alignment “mistakes” in wheel pose
Common “mistakes” in wheel pose are: the knees falling out to the sides, feet too far apart, bent arms and elbows splaying out, hands placed too wide and palms not flat on the ground.
I call these “mistakes” in inverted commas because it’s easy to insist that people to follow certain alignment rules, but all of these “mistakes” are signs that you might not be flexible or strong enough to do wheel with proper alignment just yet. And that is completely normal!
It’s not a mistake if your body simply can’t do the proper alignment yet. But if it feels painful to do the pose without proper alignment, your practice is probably better spent by modifying your wheel pose instead or working on some of the poses that will help you build flexibility and strength for a wheel pose with better alignment.
Remember that your yoga practice shouldn’t ever feel painful. Always change your practice up if that is the case.
Getting In Wheel
Lifting into wheel pose from the floor can be quite the challenge when you’re first starting out. If this entry to wheel doesn’t feel possible just yet, there’s a way to learn it here.
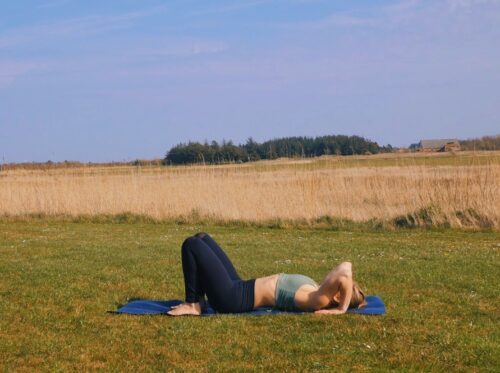
Step 1: Lie on your back with bent knees and the soles of your feet right behind your hips. Bend your elbows and place your palms on either side of your head with the fingers pointing towards your shoulders.
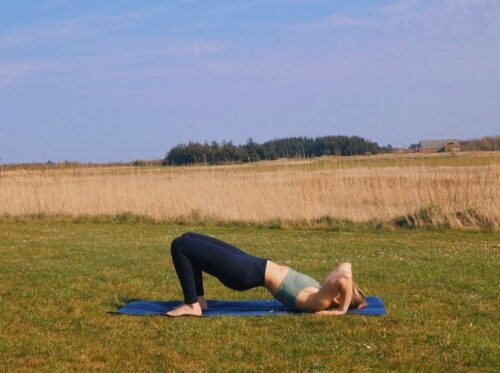
Step 2: Push into your hands and feet to lift your torso off the ground and place the top of your head down on the ground, still pushing into the hands so your head isn’t carrying the full weight.
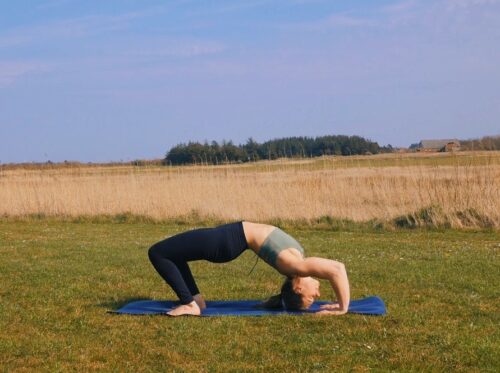
Step 3: Lift the rest of the way up, pushing actively into arms and legs. Squeeze your knees and elbows toward each other to engage the inner thighs and arms. Root the back of your knuckles into the ground, so the weight is distributed into the entire palms of your hands.
Exiting Wheel Pose
Step 1: Tuck your chin toward your chest. Optional to lift your heels off the ground (it gives you more space on the way down).
Step 2: Slowly bend your arms to lower your upper back down.
Step 3: Roll the rest of the spine and the hips onto the ground.

How To Modify Wheel Pose For Your Needs
Option 1: Easier on the wrists
Wheel pose can demand a lot from our wrists, especially when our shoulders are not very flexible yet it forces our wrists to compensate and bend very deeply into extension. One way to modify wheel pose to avoid wrist pain is to use a wall and two blocks (or books, bricks, basically whatever you have lying around at home of similar size and shape).

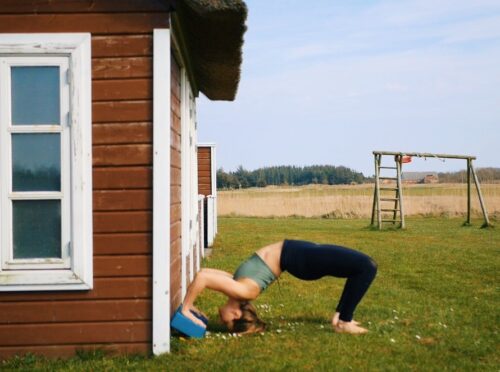
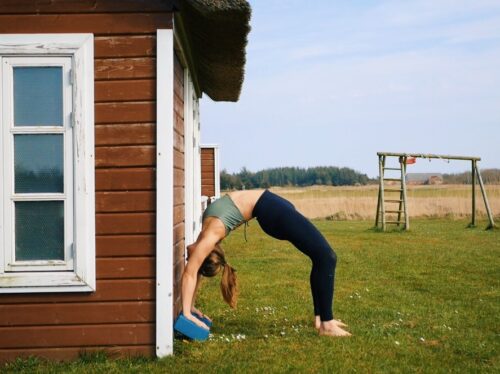
Step 1: Place two blocks diagonally on the wall on the lowest setting. Make sure they won’t slip and fall off the wall, you can place something under them to keep them in place.
Step 2: Lie down with your head toward the wall and your shoulders right behind the blocks. Place your hands on the blocks with your fingertips pointing toward your shoulders.
Step 3: Then lift up into wheel pose like you normally would (see explanation above).
The angle of the block should minimize the amount of bending your wrists will be forced into and you can make it steeper if you’re still feeling some discomfort in wheel pose.
Option 2: Easier on the lower back
Wheel pose demands a lot from our lower back when our hip, upper back, and shoulder flexibility isn’t adequate to make our backbend even throughout the entire body. When that’s the case, we’ll be forced to bend deeply from our naturally flexible lower back area and that can cause strain or pain in the lower back. You can modify the wheel pose to be less demanding for your full body, so the lower back isn’t forced into deep a bend.
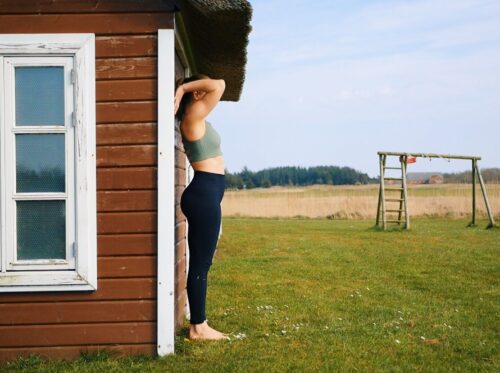

Step 1: Find a clear wall. Stand with your back to the wall and place your hands on the wall on either side of your face with the fingertips pointing down. Tuck your pelvis so your pubic bone moves forwards and up.
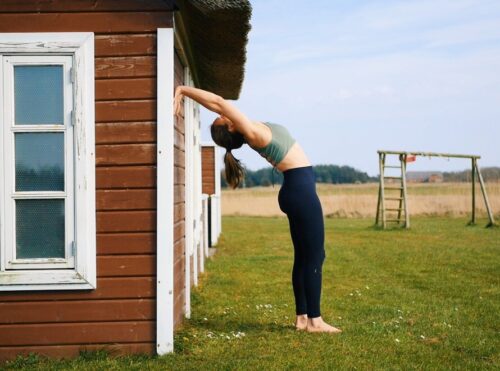
Step 2: Push into the wall with your hands and walk your feet further away from the wall. Keep the pelvis tucked and bend your knees slightly to make it feel more like regular wheel pose.
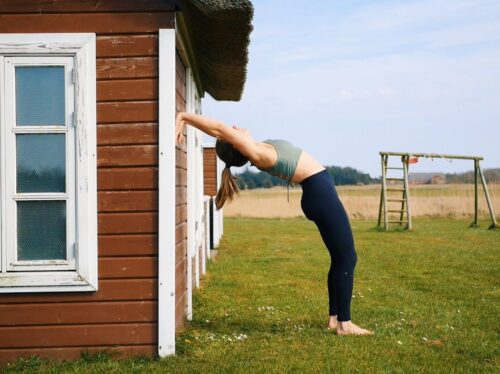
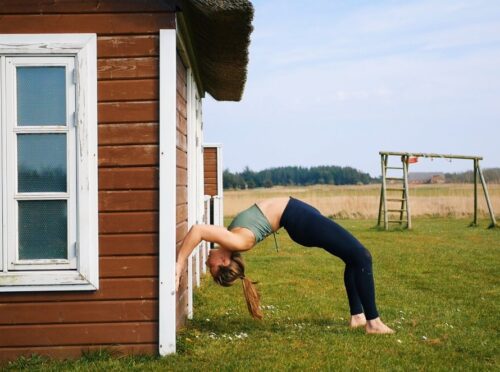
Step 3: Stay where you are or walk your hands further down on the wall for a deeper backbend.
Step 5 – to exit: Walk your hands up and your feet in toward the wall to come back to standing.
Option 3: Can’t push up into wheel from the floor yet? Try this
Wheel pose can be incredibly challenging to lift up into in the beginning and perhaps it isn’t possible for you just yet. This exercise in a modified wheel pose will help you build the strength to lift up into full wheel pose.
Step 1-3: Same steps as in Option 2.
Step 4: Try to bend and straighten your arms in this position a few times. You should feel your arms working and perhaps a nice stretch at the same time.
Step 5: When step 4 feels easy and controlled, walk your hands lower down on the wall and repeat step 4. Eventually you will be able to straighten your arms back up so close to the ground that you’ll be able to enter wheel from the floor!
Step 6 – to exit: Walk your hands up the wall again and your feet in toward the wall to come back to standing.
Prepare Your Body For Wheel Pose
Wheel pose requires strength in the entire back side of our bodies and flexibility in the entire front side. We can prepare for wheel pose by building specific strength in the wrists, arms, back, bum, and the back the the thighs and flexibility in the wrists, arms, chest, spine, hips, and thighs.
Build Flexibility For Wheel Pose
Here are 6 yoga poses that will help you build flexibility in those essential areas of the body that need to be flexible before you can do wheel pose with ease.
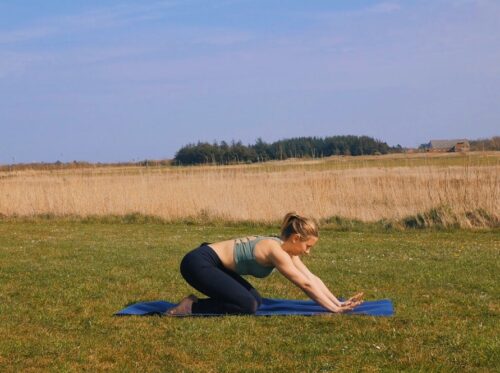
Table top wrist stretches
Start in a tabletop position with your entire palms grounded into the mat. Then bring your knees forward and a little closer to your hands. Lean your shoulders forward until you feel a nice intensity of stretching in your wrist. You can rock the shoulders back and forth, moving in and out of the stretch or hold it for 20-30 seconds. Don’t go so far forward that it feels too intense.
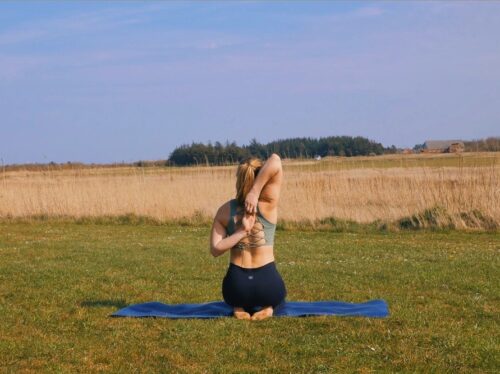
Cow face pose
Start in any comfortable seated position. Lift your right arm up overhead and bend the elbow, moving your right hand down to touch your back and keeping the elbow lifted up high.
Bring your left arm out to the left side with your thumb pointing down. Bend your arm and bring the back of your hand in to touch your back.
Crawl your hands toward each other on your back. Keep your chest lifted and your spine elongated. The hands can hold on to your shirt, a strap, or if possible, clasp behind your back. You should be able to feel a stretch in your upper arms. Repeat the pose on the other side.
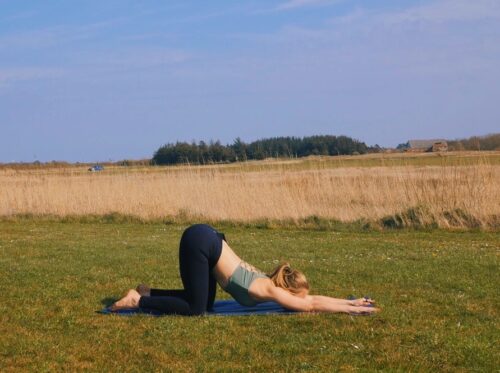
Puppy pose
Start in a tabletop position. Keep your hips above your knees as you walk your hands forward and let your chest sink down toward the mat. You can bring your forehead or your chin to touch the mat (or onto a block).
Pushly lighty down into your palms to engage your arms and shoulders. Squeeze your shoulder blades together and breathe deeply, letting your chest sink down a little more with every exhale. You should be able to feel a stretch in the shoulders and the spine.
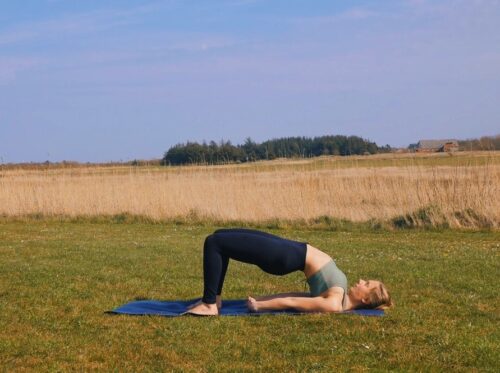
Bridge pose
Lie on your back with your knees bent and your feet placed right behind your hips. Squeeze your elbows to your sides, collect your shoulder blades on your back.
Push into your feet to lift your hips off the ground, then roll the rest of your spine up off the ground too. Keep squeezing your shoulder blades together and your knees toward each other.
Keep pushing into the feet and lifting the hips high. Optional to interlace your fingers behind your back and straighten your arms. You should be able to feel a stretch in the spine and possibly at the front of your hips too.
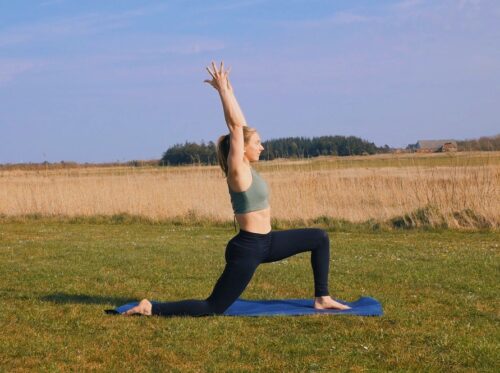
Crescent lunge pose
Start in a forward fold at the top of your mat with your palms on the mat. Step your right leg far back on the mat and lower the right knee down. Lift your arms up overhead or bring your hands to your hips. Keep your lower back elongated by tucking your pelvis under. You should be able to feel a stretch at the front of your right hip. Do the pose on both sides.
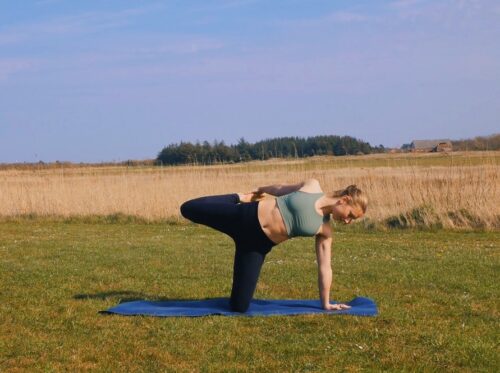
Bound sideplank pose variation
Start in a tabletop position with your toes tucked under. Straighten your left leg out behind you with the toes still on the mat. Roll to the inside edge of your left foot, send your right foot out to the right side, and open your front up to the left side.
Lift your left arm up, bend your left knee, and grab your left foot with your left hand. Keep your hips opening up toward the left side and kick your left foot into your hand. You should be able to feel a stretch in your left thigh. Repeat on the other side.
Strengthen Your Wheel Pose
Tabletop pose variation for wrist strength
Start in a tabletop position with the palms grounded. Lean your torso backwards but keep the bend in your wrist as your palms leave the ground. Hold it for 20-30 seconds, still bending your wrists back as much as you can whilst keeping your fingers straight.
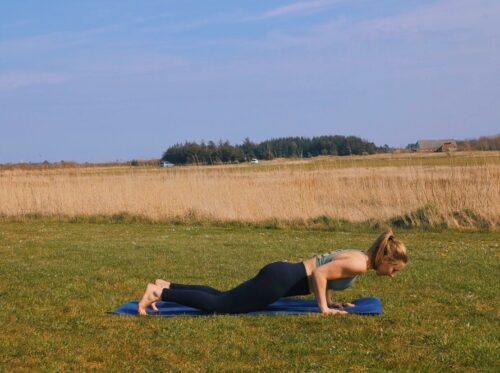
Chaturanga on knees
Start in a plank pose and place your knees down. Lean the shoulders forward so they’re stacked on top of the center of your palms. Keep your collarbones wide as you bend your elbows, squeezing them in to your sides and keeping them over your wrists. Keep bending your elbows until your shoulders are level with your elbows (or stop before then when you can’t go any lower with control).
To really build strength in the arms, push back up to plank pose on your knees. Keep everything from your knees to the top of your head one straight line the entire time. You should be able to feel your shoulders and arms working.
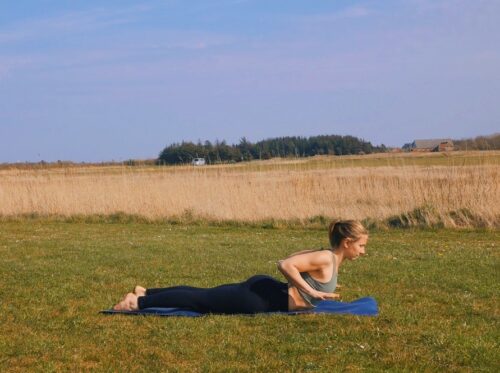
Low cobra pose with floating hands
Lie on your belly and place your hands underneath your shoulders with your elbows pointing back. Your legs straightened and engaged, tops of the feet on the mat.
Squeeze your shoulder blades together and float your hands up off the ground. Then lift from the top of your spine into a low cobra. You should be able to feel your upper back working.
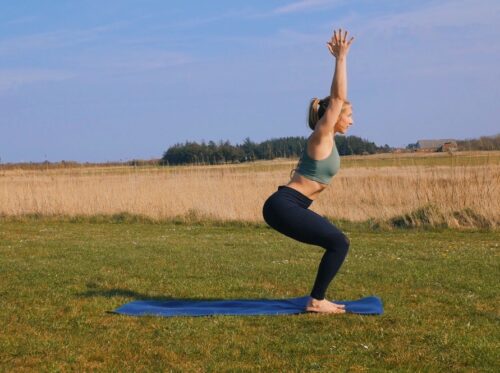
Chair pose
Stand with your feet hip width distance. Bend your knees and send your hips backwards, keeping your chest upright and lift your arms up overhead. Lean your weight into your heels so your can see your toes past your knees when you look down. Keep your spine long and sit a little deeper. You should be able to feel your bum engaging.
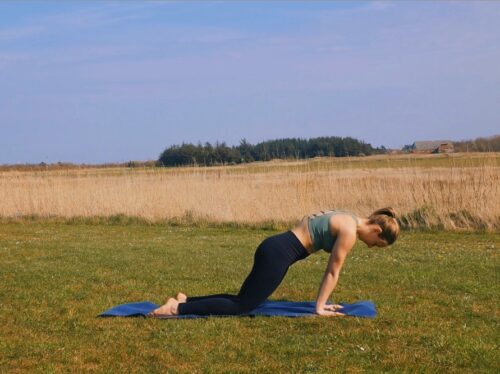
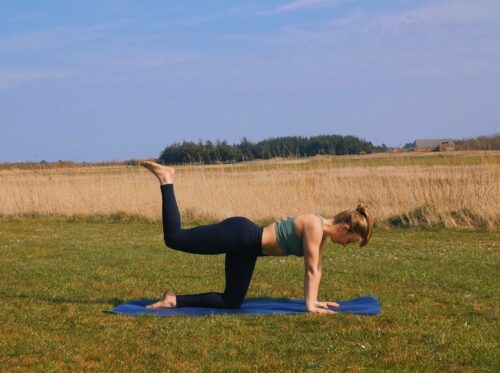
Bird dog pose variation
Start in a tabletop position. Elongate your spine from the top of your head to your tailbone. Keep your right knee bent 90 degrees but lift it until your thigh is parallel to the ground. Keep your lower back from arching. You can place a block on it to test yourself.
Then kick the sole of your right foot a little higher. You can hold it still or do small pulses kicking it higher but keep your lower back long. You should be able to feel your bum and the backs of your thighs working (a lot!).
Advanced Wheel Variations And Transitions
This section is options for intermediate-advanced yoga practitioners who already feel comfortable in wheel. Please only attempt this is you feel safe doing so and if you’re comfortable with regular full wheel.
These variations and transitions will help you challenge your strength and stability in wheel and go deeper in your backbend practice.
Challenge Your Wheel
A few things for you to explore and practice.
Lifting a leg
Push even harder into your feet and hands to lift one leg up. You kan keep the knee bent or straighten the leg completely.


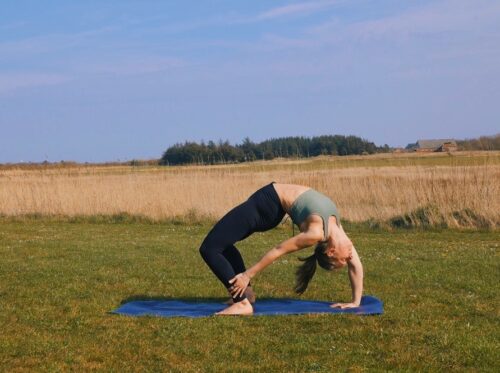
Grab your ankle
This one requires a lot of extra stability and strength in your wheel. Lift one hand off the ground and bring it out to the side and back to grab for your ankle. It might not be close enough to touch yet, but you’ll still build strength and stability in your wheel doing this.
Flowing Into Wheel
Some transitions to and from wheel to incorporate into your yoga flows.
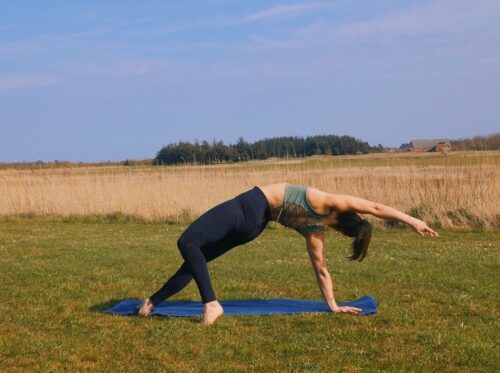
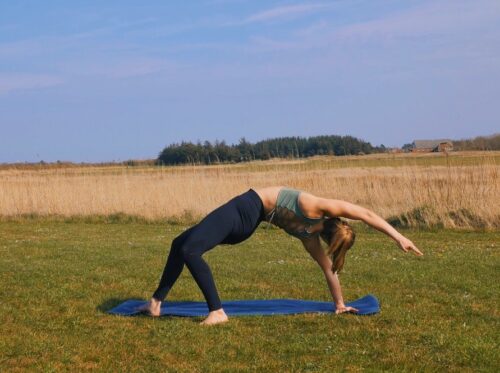
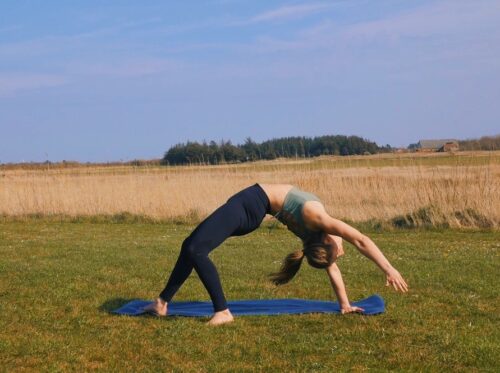
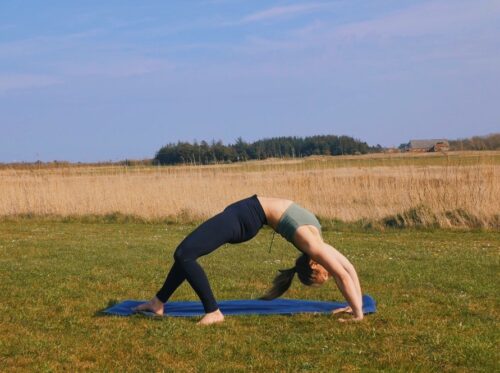
Wild thing to wheel
Starting in wild thing start to turn your bottom hand so the fingertips that point toward the top of the mat in the beginning start pointing back behind you. Rotate your chest towards the sky, look down onto the top of your mat. Keep rotating your bottom hand so the fingertips eventually point towards the back end of your mat and place your other hand down. Walk your feet in until you feel stable and comfortable in your wheel pose.
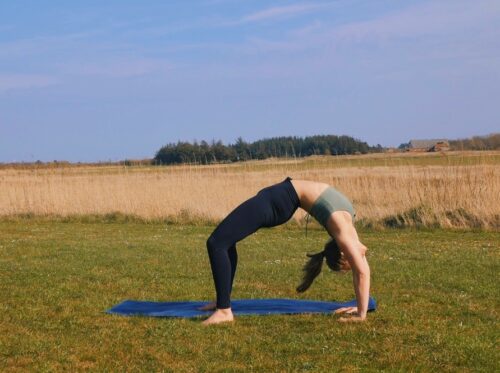
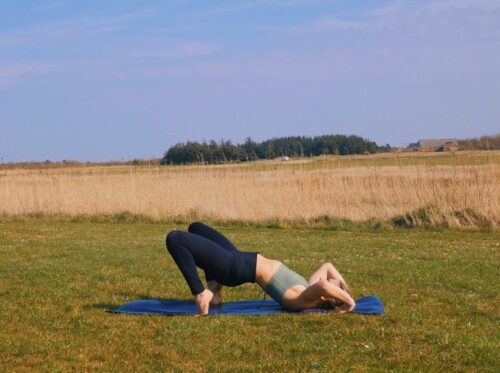
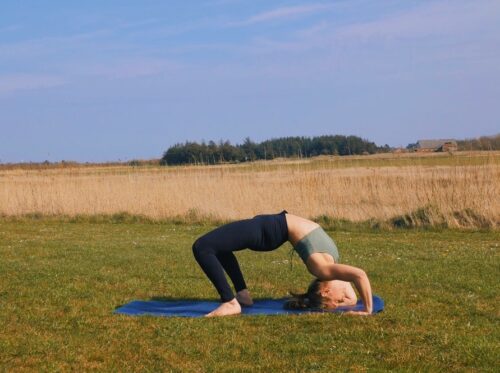
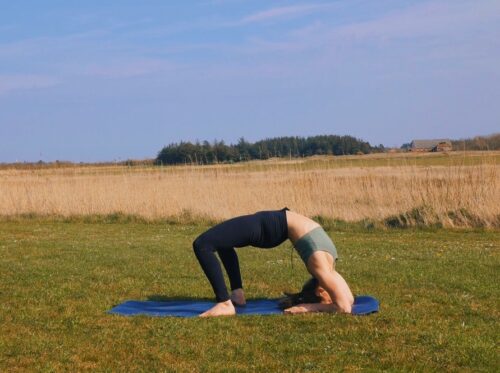
Wheel to forearm wheel
Starting in wheel, carefully bend your arms and lower the top of your head down onto the mat. Then slide your forearms onto the mat with your elbows on either side of your face and your hands are behind you. Ideally your forearms are parallel and shoulder width distance apart.
Push into your forearms and your feet to lift your head off the ground. Push your forearms toward your feet to open your shoulders as much as feels comfortable. Keep squeezing your knees together and lifting your hips high.


I hope you found this guide to wheel pose helpful. If there’s any other yoga pose you want to know how to do and prep for, please leave it in comments below!

Thank you so much for this excellent instruction.
Excellent instructions. Thank you for all the tips.