Acroyoga is one of my favourite forms of movement to do with others. It’s fun, it builds connection and trust, and it’s incredibly empowering.
I started doing acroyoga around 4 years ago and since then I’ve gotten to know so many lovely people through our shared love of movement and connecting through movement. I’ve also gotten lots stronger, more flexible, and have much better body awareness in large part thanks to acroyoga.
I’m currently in lockdown due to coronavirus with the rest of my fellow Danes for at least another 3 weeks. If you’re stuck inside somewhere too and want to take your mind off everything that’s been going on in the world lately, then I highly recommend convincing whomever you’re living with to join you and try out acroyoga. Even if you’re not stuck in inside, give these poses a try if you’re curious about acroyoga.
If you’re not even sure what acroyoga is yet, you can learn much more about it here.

Acroyoga Poses Step-by-step
Below are detailed step-by-step instructions on how to do four different acroyoga poses and how to spot them safely too. I hope have the courage to give them a try!
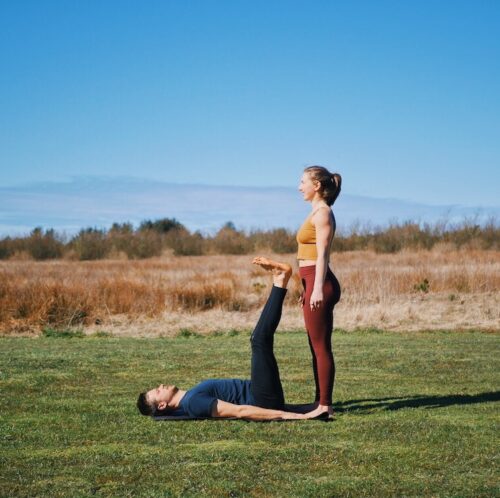
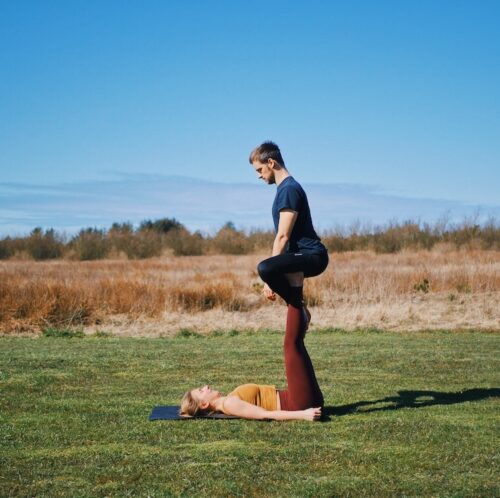
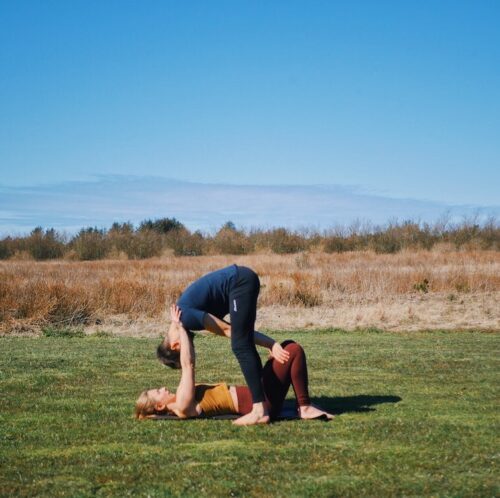
Bird pose
Bird pose is a great beginner friendly acroyoga pose! Many people have probably tried the pose without calling it acroyoga when they were a kid and their parents would lift them up on their feet and pretend they were flying (at least that’s a story from my childhood).
Step-by-step instructions for bird pose
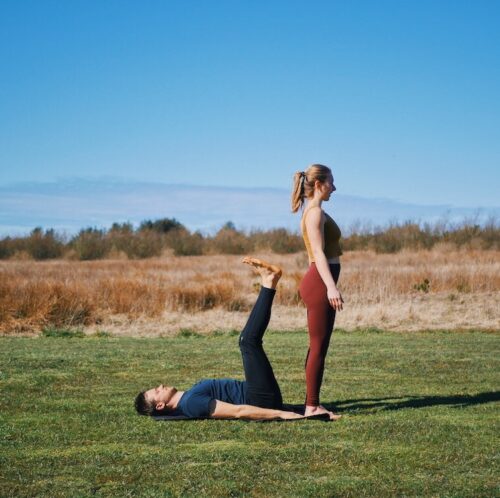
Step 1
Base: Lie on your back and lift your legs straight up into the air. Place your arms along your sides.
Flyer: Stand right behind the bases hips. You should be so close that the bases fingertips can reach your toes.
Spotter: Stand to one side of the base in a wide stance with bent knees.
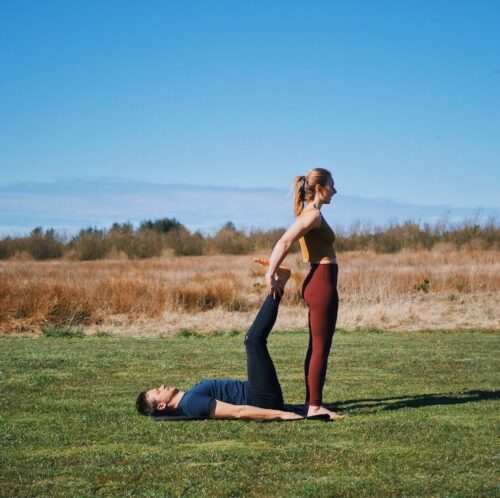
Step 2
Base: Reach your arms straight up into the air and point your fingertips out to the sides. Place your feet parallel on the flyers hips and connect the pad of your foot to the hip bone of the flyer.
Flyer: Stand straight and reach your arms out in front with your thumbs pointing toward each other and the remaining fingertips pointing forwards.
Spotter: Reach one arm across the low back of the flyer, have a hand on either side of their hips with the thumb pointing to their back and the fingers pointing to their front. Stay really close without touching the flyer yet.
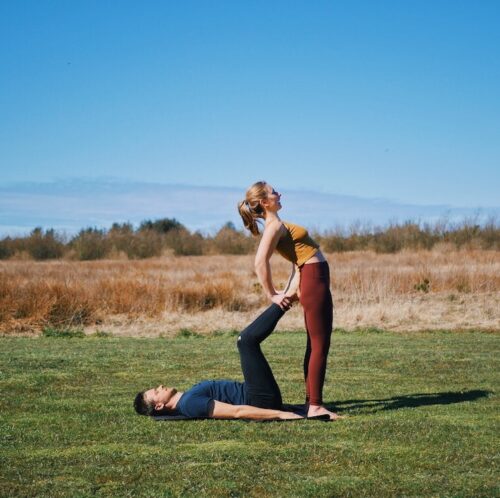
Step 3
Base: Bend your knees to tip the flyers weight over you. Connect hands with the flyer when they’re low enough to reach.
Flyer: Lean your weight into the base’s feet and hold your shape. Clasp hands with the base when you’re low enough to touch them without bending at the hip.
Spotter: Stay close and follow the flyers hips with your hands. Be ready to grab hold of the flyers hips and support them or bring them back to the ground if they’re about to fall.
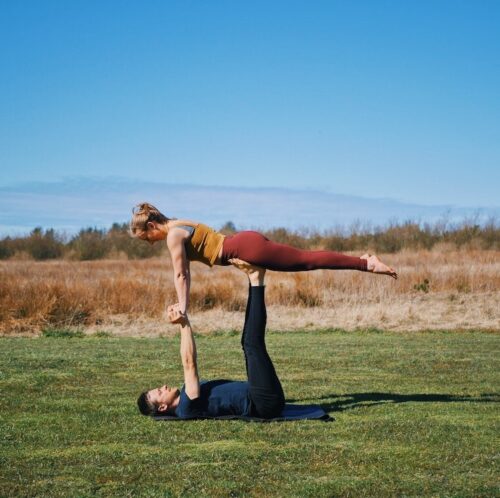
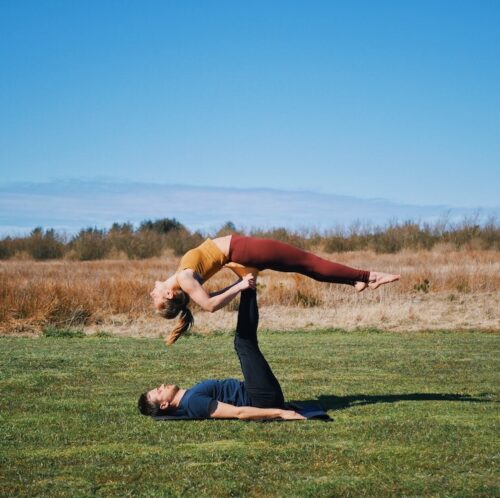
Step 4 – BIRD!
Base: Flex your ankles and straighten your legs, driving the sole of your feet, especially your heels into the hips of the flyer to scoop them up into the air. Keep your arms straight and your feet over your hips in a bone-stacked position.
Flyer: Hold your plank shape with your hands underneath your shoulders. Keep your arms straight.
Spotter: stay close to the flyer’s hips with your hands. Always standing close to the base and being ready to grab hold of the flyer if anything goes wrong.
To exit bird pose:

Step 5
Base: Bend your knees and point your toes to bring the flyers feet to the ground and tilt their torso upright
Flyer: Keep your plank shape and release the base’s hands when your feet find the ground.
Spotter: Keep spotting near the hips until the flyer is standing on the ground.
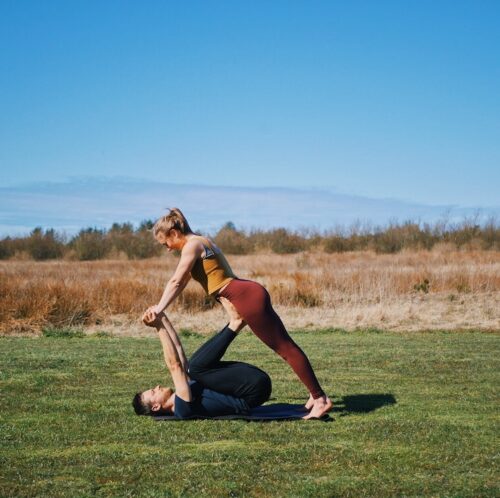
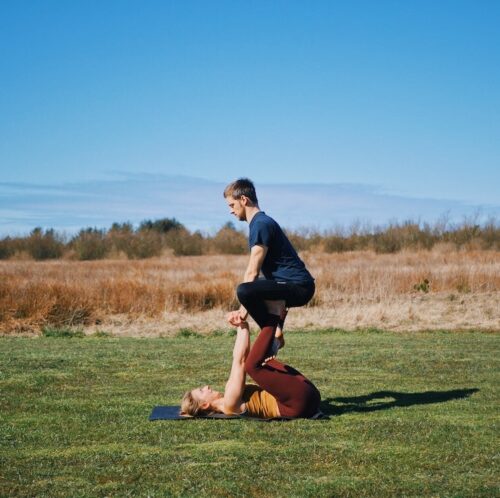
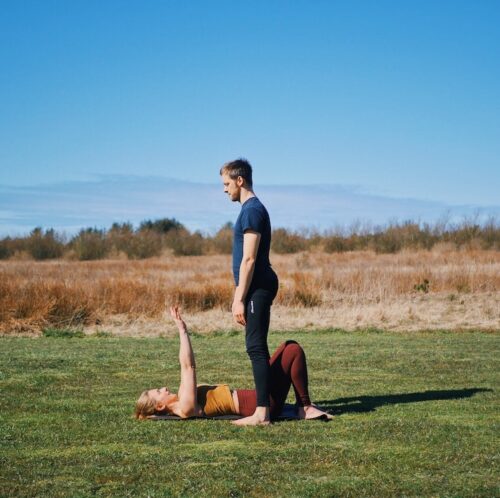
Throne pose
Throne pose is a bit more tricky but still one of the most beginner friendly acroyoga poses. It’s extra nice for the person flying because they have their hands free and sit quite comfortably in this pose (at least with practice they do).

Step-by-step instructions for throne pose
Step 1
Base: Bend your knees deeply and place your feet on the inner thighs of the flyer so your toes are where the inseam of jeans would be. Connect hands with the flyer.
Flyer: Stand right behind the base’s hips in a wide legged squat. Lean forward to connect hands with the base.
Step 2
Base: Wait for the flyer to lean forward and then straighten up your legs. Keep your arms straight to support the flyers upper body.
Flyer: Lean your body forward pouring weight into the base’s hands. Tuck your knees up towards your chest when you feel the base’s feet push up into your thighs.
Spotter: Stand close to one side of the base’s hips and have your hands very close to the flyers hips without touching. Grab hold of the flyer’s hips if something goes wrong and the flyer might fall down.
Step 3
Base: Bend your knees but keep your arms straight to lift the flyer’s torso upright.
Flyer: Cross your shins forward and over the base’s shins and wrap your feet around the bases shins to lock yourself in place.
Spotter: Keep close and be ready to grab and support the flyer should anything go wrong.
Step 4 – THRONE!
Base: Leg go of the flyer’s hands and straighten your legs up.
Flyer: Keep your torso upright and let go of the base’s hands.
Spotter: Stay ready to avoid a possible fall and bring the flyer safely down to the ground again. Don’t stop spotting until the flyer has safely returned to the ground again.
To exit throne pose:
Step 5
Base: Bend your knees and connect hands with the flyer. Bend your knees and send them back over your hips to place the flyer down.
Flyer: Unwrap your ankles and bring your feet back placing them on the ground.
Spotter: Keep spotting near the hips until the flyer is standing on the ground.
Tired of dealing with aching wrists in your practice?
Get The Complete Wrist Guide so you can practice yoga, arm balances, and handstands with ease and stability!
The ebook includes 17 exercises that build strength and flexibility in your wrists and forearms, two exercise program templates, and a printable wrist exercise sheet, along with tips on how to position your hands and distribute weight in your palms for optimal comfort and balance.
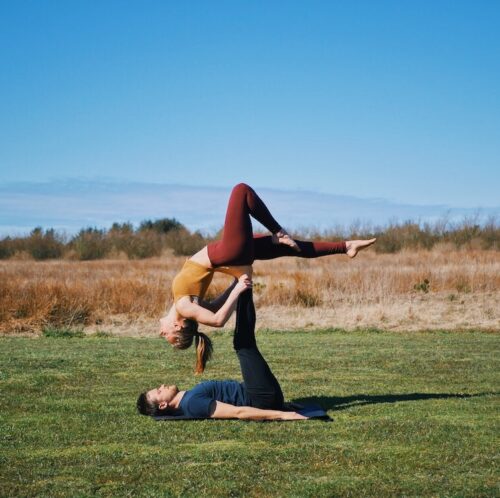
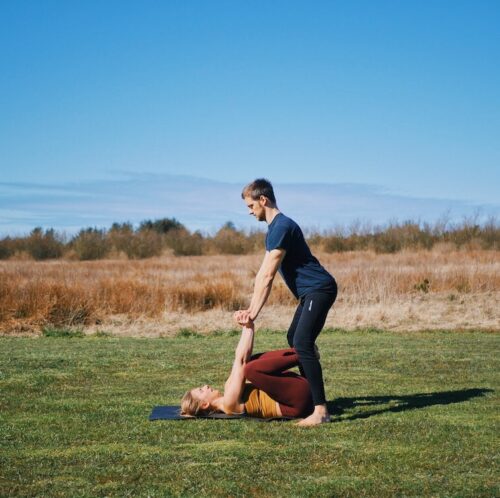
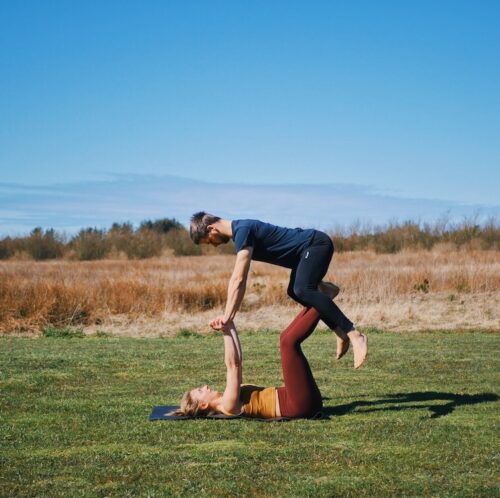
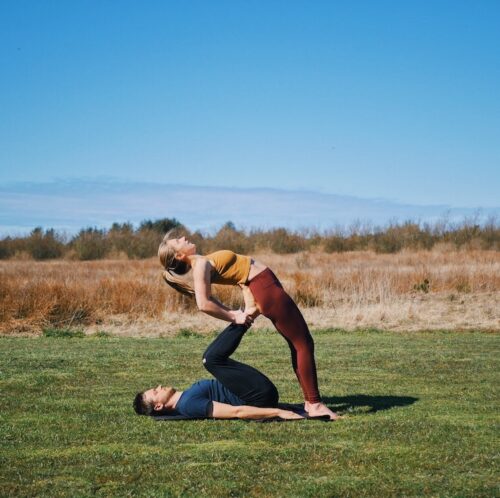
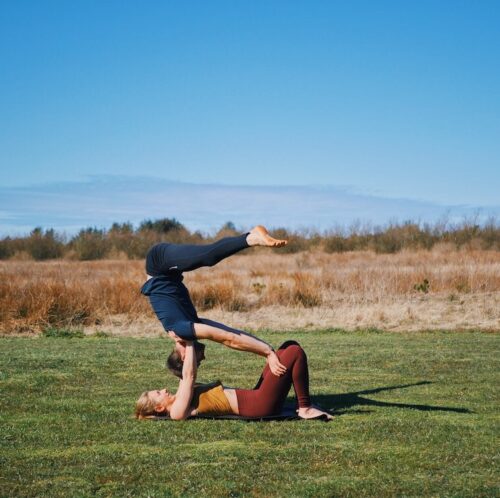
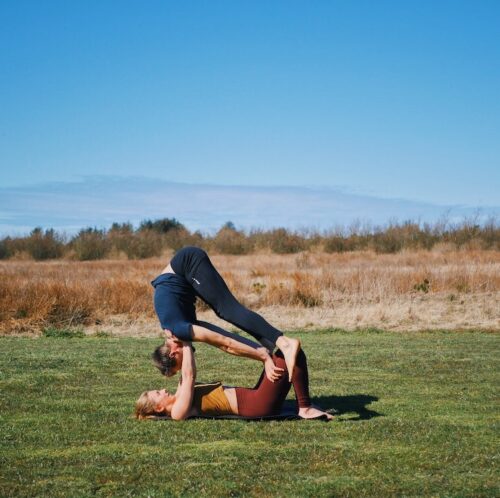
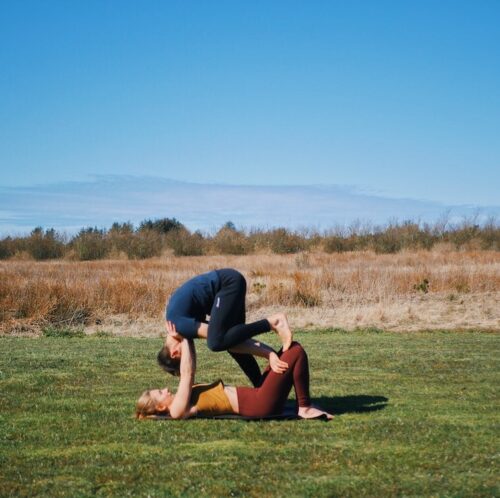
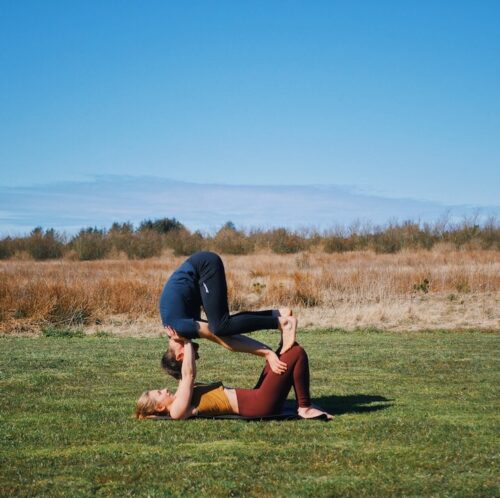
Backbird pose
In backbird the flyer is lying on the base facing upwards. It requires giving over trust since the flyer won’t be able see the ground below. The backbird acroyoga pose also a great supported backbend for the flyer. It feels like a nice, welcome stretch after a long day of sitting in front of a computer.
Step-by-step instructions for backbird pose
Step 1
Base: Lift your legs up into the air.
Flyer: Stand close to the base’s hips with your back turned toward the base.
Step 2
Base: Flex your ankles and bend your knees slightly.
Flyer: Reach behind your back and grab hold of the base’s ankles with a legoman-shaped grip with your thumbs turned in and fingertips wrapped around the outsides of the ankles.
Spotter: Wrap one arm across the belly of the flyer, keeping your hand close to the outside of the hip. Bring your other hand close to the top of the flyer’s shoulder.
Step 3
Base: Place your feet on the sacrum of the flyer (right below the low back) and make sure the entire foot is connected to the flyer.
Flyer: Arch and lean backwards pouring your weight into the base’s feet.
Spotter: Block any fall to the sides or toward the flyer’s head.
Step 4 – BACKBIRD!
Base: Bend your knees until the weight of the flyer is over you. Then straighten your legs straight up above your hips. You can place your hands on the flyer’s shoulders for extra stability.
Flyer: Keep arching and leaning over the base’s center.
Spotter: Stay close and be ready to block any possible fall and guide the flyer safely to their feet again.
To exit backbird pose:
Step 5
Base: Bend your knees and point your toes to bring the flyer’s feet to the ground. Then straighten your legs pushing gently away from you to help the flyer’s torso upright.
Flyer: bend your knees and place your feet on the ground. Push into the base’s ankles behind you to help get your torso upright.
Spotter: Keep spotting near the shoulder and the hip until the flyer is standing on the ground.

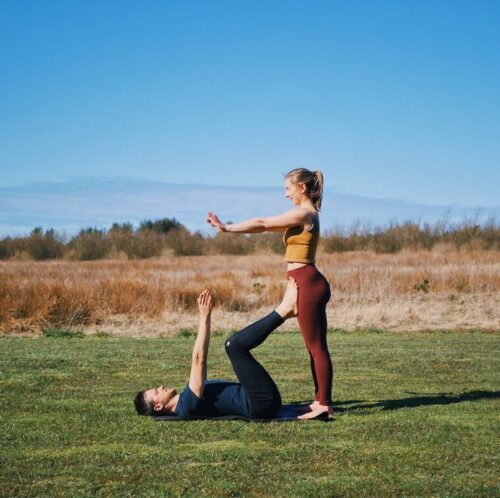
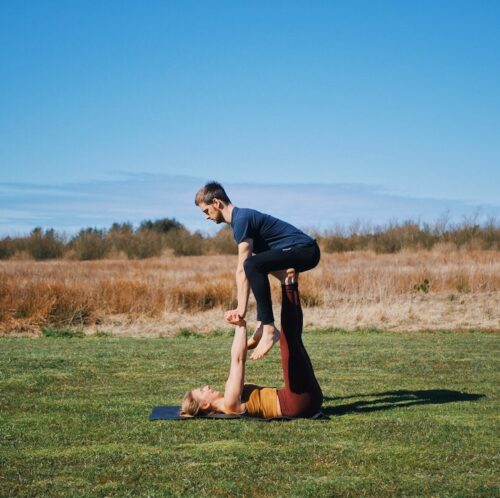
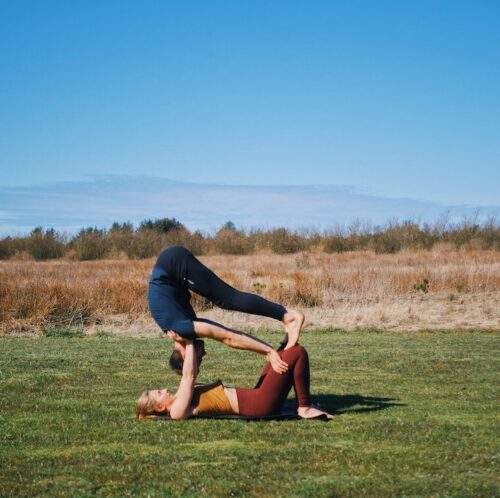
Shoulderstand pose
There are different variations of shoulderstands in acroyoga. This one is the easiest to enter and the one that’s closest to the ground making it easier to control. In this pose the flyer is turned completely upside down, which is new to many people so take it slow and communicate as you move into the pose.
Step-by-step instructions for shoulderstand pose
Step 1
Base: Lie down with bent legs and place your feet on the ground close to your hips. Feet are hip-width distance apart. Lift your arms straight up.
Flyer: Stand in a wide legged stance with your feet on either side of the base’s belly.
Spotter: Stand close to the base’s head.
Step 2
Base: Bring your hands onto the flyer’s shoulder so the base of your hand meets the top of the flyer’s shoulder and your fingers are on the upper back.
Flyer: Fold forward at the hip, reach between your legs, and grab the base right below the knees (with your thumbs pointing towards each other, fingers pointing out to the side). Bring your shoulders forward into the base’s hands.
Spotter: Stand ready to bring your hands very close to the flyers hips without touching unless they’re about to fall or need extra help.
Step 3
Base: Keep your hands right over your shoulders (bone-stacked position) and keep your elbows straight.
Flyer: Round your upper back slightly, pouring weight into the base’s hands. Step one foot at a time onto the base’s knees. Then lift your hips up high.
Spotter: Grab hold of the flyer’s hips if something goes wrong and the flyer might fall down.
Step 4 – SHOULDERSTAND!
Base: Stay bone-stacked in your arms, fingers pushing into the flyer’s back to give them extra support.
Flyer: Straigthen your legs sending your hips over your shoulders, push firmly into the base’s thighs and lift your legs up and out to the side.
Spotter: Stay near the flyer’s hips at all time. Stabilize them or grab hold and bring them to the ground if necessary.
To exit shoulderstand pose:
Step 5
Base: Push your hands slightly towards your feet to bring the flyer back down.
Flyer: Bend at your hips and bring your feet toward the ground, placing them wide on either side of the base to land back down.
Spotter: Keep spotting the hips until the flyer has returned to the ground.
Tip for the flyer: Step 3 of getting into shoulderstand, the climb up onto the knees, can feel a little awkward. To get as much support from the base as possible lean your weight into your shoulders and upper back and into the base’s hand. See the intermediate steps in getting up onto the knees below:
I hope you enjoyed trying out these different acroyoga poses! Comment below if you have any questions or want to request a tutorial for some specific acroyoga poses.
You can learn lots more fun movement stuff in my free creations that I share in my newsletter! Sign up for my newsletter below:
As always, I’m rooting for you!
xx Cami